Tuesday, December 29, 2009

Test Fit - Body to Frame!

SUCCESS! The body fits perfectly on the frame with the wider rear tires and newer Chevy 350 engine. The ONLY modification that needs to be made is to the tranny tunnel........ and that is just very slight to allow a little more clearance than is currently there. Very easy fix. No widening of the rear fenders is going to be required which is a relief. When all is said and done, I should be able to drop the rear of the car 2-3" to give it a lower stance..... but I will worry about that in the end.
The body has now been removed from the frame again. Engine will be pulled out of the frame and mocked up on the engine stand. Pressure tested, cleaned up, painted, and shiny chrome parts added.

Body work will begin shortly with the fun part of wire brushing UNDER the body. Patching a few tiny holes.......and then repainting / undercoating the car.

I'm currently modifying my el-cheapo creeper that I picked up for $5 at a garage sale to have a tilting back so I can sit more upright when under the car (like a recliner).

Friday, December 4, 2009

Rear Exhaust Hangers Fixed...

It was pointed out from my previous post that the rear exhaust hangers would likely be a problem to access once the body was placed back on the frame. Luckily for me this was mentioned now before I found out the hard way later (Thanks Glenn!) To fix this, I simply welded nuts to the TOP where they used to be sitting, and attached the brackets BELOW the frame. I will easily be able to bolt the hangers right up from below, and not have to worry about the nut spinning or accessing the top at all.
With the nuts welded into place, I tightened up the hangers and cut off the remaining bolts sticking up with my cut off wheel.

Tuesday, December 1, 2009

Exhaust FINISHED!

The exhaust is finally all mocked up! Everything is welded & hung. Next up will be to drop the body back down on to the frame and test fit everything with the exhaust & new engine.
Fabbed up brackets for the exhaust hangers to bolt to. They came out perfectly fine. These will get primed and painted to match the frame color.

Saturday, November 28, 2009

Exhaust Almost Done!

I almost have the "over-the-axle" exhaust pipes completed. I just have to mock up the exhaust hangers and finish the extensions of the exhaust out the back of the car.


Hoping to finish the rest of the exhaust up tomorrow. Next I will remove the rear fenders off the body and set the body back down on the frame to make sure everything fits with the new engine. Once I verify everything fits properly, and I check how the fenders will fit with the wider rear tires, I'll take the body back off, put the frame out back for winter, and work on the body over winter. Finally getting to something that people will notice!

Thursday, November 12, 2009

Exhaust Mufflers Attached!

I have the exhaust mocked up now all the way to the mufflers. Out of the engine, into the H-Pipe, and then into the Flowmaster 50HD mufflers.

Next step will be to complete the "over-the-axle" pieces allowing the exhaust to shoot straight out the back of the car.

Sunday, November 8, 2009

Exhaust 50% Complete!

The exhaust is moving along nicely now that I have my layout all set. It dumps out of the engine with 2" pipes and after the first 90 degree bend increases to 2.5" pipe. From there it hits the H-pipe, into the mufflers, and then over the rear axle and out the back. The H-Pipe has been welded to the drops from the engine now, everything is welding nicely. Yes, the driver's side drop is slightly crooked. This is to help avoid the power steering box as much as possible.
Rough layout of how the H pipe / Mufflers will be layed out. The mufflers are slighly used FlowMaster 50HDs. They are the middle of the road mufflers in terms of loudness and resonance. I should have a nice rumble out of them, but not SOOOOOO loud that you get a headache driving the car.
More to come soon. Hopefully I can get the exhaust finished up this week. It has been nice the past few days, but the cold weather is quickly approaching!

Wednesday, November 4, 2009

Exhaust Drops From Engine Built!

When building the 2 exhaust drops from the engine, I forgot to put the collar on the passenger side pipe before welding it together. To fix that I cut the collar in half, put it around the pipe, then welded it back together. Welding magnets held it perfectly in place while I tacked it back together.
Exhaust drops out of the engine are now complete. I will bolt them in to place, and then start to finish the rest of the exhuast. I'm going from a 2" exhaust out of the engine into a 2.5" exhaust. you can see the 2-2.5" reducers here. From this point the exhaust will go into the H pipe, then the Flowmaster 50HD mufflers, and then out the back of the car.

Sunday, October 25, 2009

New Studs for the Ram Horns!

So much to do, so little time....... I sandblasted the ram horn headers and then had to use my neighbors blow torch to heat them up to remove the old rusted studs.

With the studs removed, I then used a 3/8 - 16 tap to clean out the threads.
The new studs went in fairly well. One side I could only get them to screw in about half as far as they FULLY could go. The other side screwed in very easy.
Next they will be bolted back on to the engine and the exhaust mockup will begin!!!!!!! I now have all the parts, just need more TIME!

Saturday, October 10, 2009

Fabbing Transmission Mount!!!!!!

With the engine mounts done and the 4th tab built for the power steering gear box, I then primed all of them with the black KBS paint.
I then set the engine back in place. Everything fit perfectly in to my new motor mounts!
Next i started to fab up a tranmission mount. I used a piece of angle iron and some quarter inch flat stock to raise the center up to where the tranmission will rest on it.
The transmission mount is almost complete. I'm going to weld on some additional supports, cut it to fit, and then bolt it into place tomorrow!

Sunday, October 4, 2009

Motor Mounts & Steering Tab 99% Done!

Lots of cutting and welding today. First I welded on some mounts to help support the motor mounts. I had to make sure the supports cleared the pittman & idler arm.
Next I made plates to weld into the center of the motor mounts just to add a little extra beef to the mounts. It was probably overkill, but I KNOW they won't be falling apart any time soon.
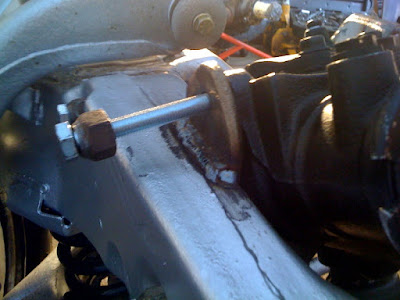
I'm switching from a manual steering box to a power steering gear box. The original box only had 3 bolts which held it to the frame. The new power steering gear box had 4. The 4th bolt had nothing to grab on to which probably would have been ok, but since i'm welding on the front end, I decided to fab up a 4th mount for it the box to bolt to. It came out pretty damn good if I don't say.

Next up...... grinding smooth all of my welds and priming everything. Then I will put the engine back in place and start working on the exhaust system.

Thursday, October 1, 2009

Engine Mounts Almost Complete!

I completed the inside portions of the engine mounts tonight. I was having a problem welding upwards...... the slag kept falling down into the gun, prohibiting a good arc. I thought I had the wire speed too fast, but it was actually the opposite. I wasn't feeding the wire fast enough to create the arc. With the wire speed increased, welding became much easier.
Driver side engine mount.
Passenger side engine mount.
Both engine mounts almost complete. Tomorrow I'm hoping to weld in the center cross supports on the mounts and then grind them smooth.