 When I was welding on the spring perches, I must have heated up the axle too much on one side and the bearing started to grind. New bearings for the pinion and axles were purchased.
Tuesday, May 5, 2009
Taking Apart the Chevy 12 Bolt Rearend!
I received this rearend free from a guy in my car club. Very good shape, but I noticed it was leaking from the pinion seal. We pulled the pinion seal and realized the inner and outter pinion bearings were going to need replacing. With this being said, we dismantled the rearend.
 When I was welding on the spring perches, I must have heated up the axle too much on one side and the bearing started to grind. New bearings for the pinion and axles were purchased.
 When I was welding on the spring perches, I must have heated up the axle too much on one side and the bearing started to grind. New bearings for the pinion and axles were purchased.
Monday, May 4, 2009
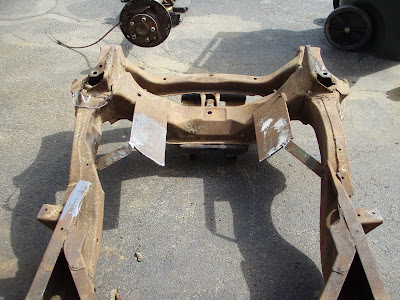
Cleaning Up The Frame, Mocking Up The New Master Cylinder!
Rear Leaf Springs Removed!
Sandblasting Cabinet!
Being that I will be having a lot of small parts to sandblast, I purchased a 40lb Sandblasting cabinet. Bought it off a guy down the road, brand new, never used.

Sunday, April 5, 2009
Tacking Rearend Into Place!
With the rearend all mocked up in place, I went to tack weld it and noticed my regulator on my Hobart 140 was not working correctly. It was showing the correct tank pressure, but the output side to the welder was pegging up all the way. I'm just going to have to call and get that replaced being that it's brand new.
To keep progress moving, I switched over to flux core wire and tacked the leaf spring perches into place. Then I removed the rearend to make it easier to completely weld it once I get my new regulator. Flux core wire is extremely messy, splatters a lot and I could really use the shielding gas to get a better quality weld, so I'll wait. Hopefully I'll get that replaced ASAP this week.


To keep progress moving, I switched over to flux core wire and tacked the leaf spring perches into place. Then I removed the rearend to make it easier to completely weld it once I get my new regulator. Flux core wire is extremely messy, splatters a lot and I could really use the shielding gas to get a better quality weld, so I'll wait. Hopefully I'll get that replaced ASAP this week.


Mocked up Chevy 12 Bolt Rearend!
Tuesday, March 31, 2009
Removing the 1941 Studebaker Rearend!
I started to remove the original 1941 Studebaker rearend, in preparation of installing the newer Chevy 12 bolt rearend.
The rearend is now free. I'll mark the angle it is sitting at, and then remove it. Stay tuned!
The rearend is now free. I'll mark the angle it is sitting at, and then remove it. Stay tuned!
Subscribe to:
Posts (Atom)


